Safety
SAFETY IN THE MAKER CLASSROOM
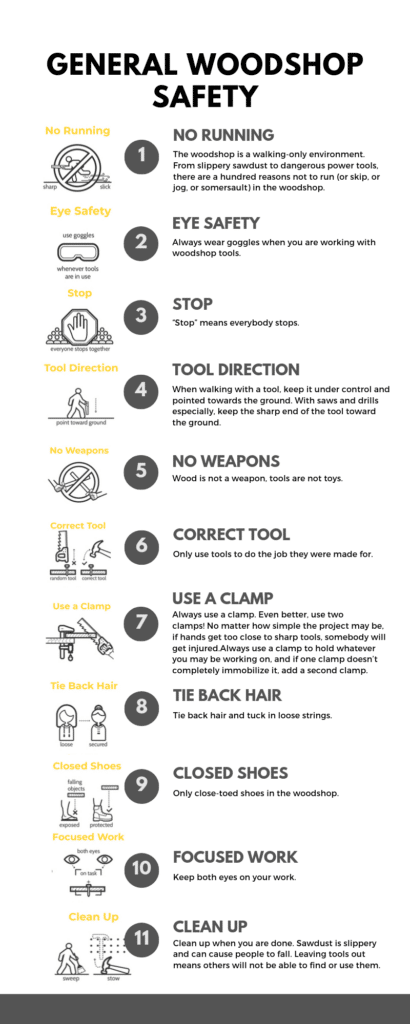
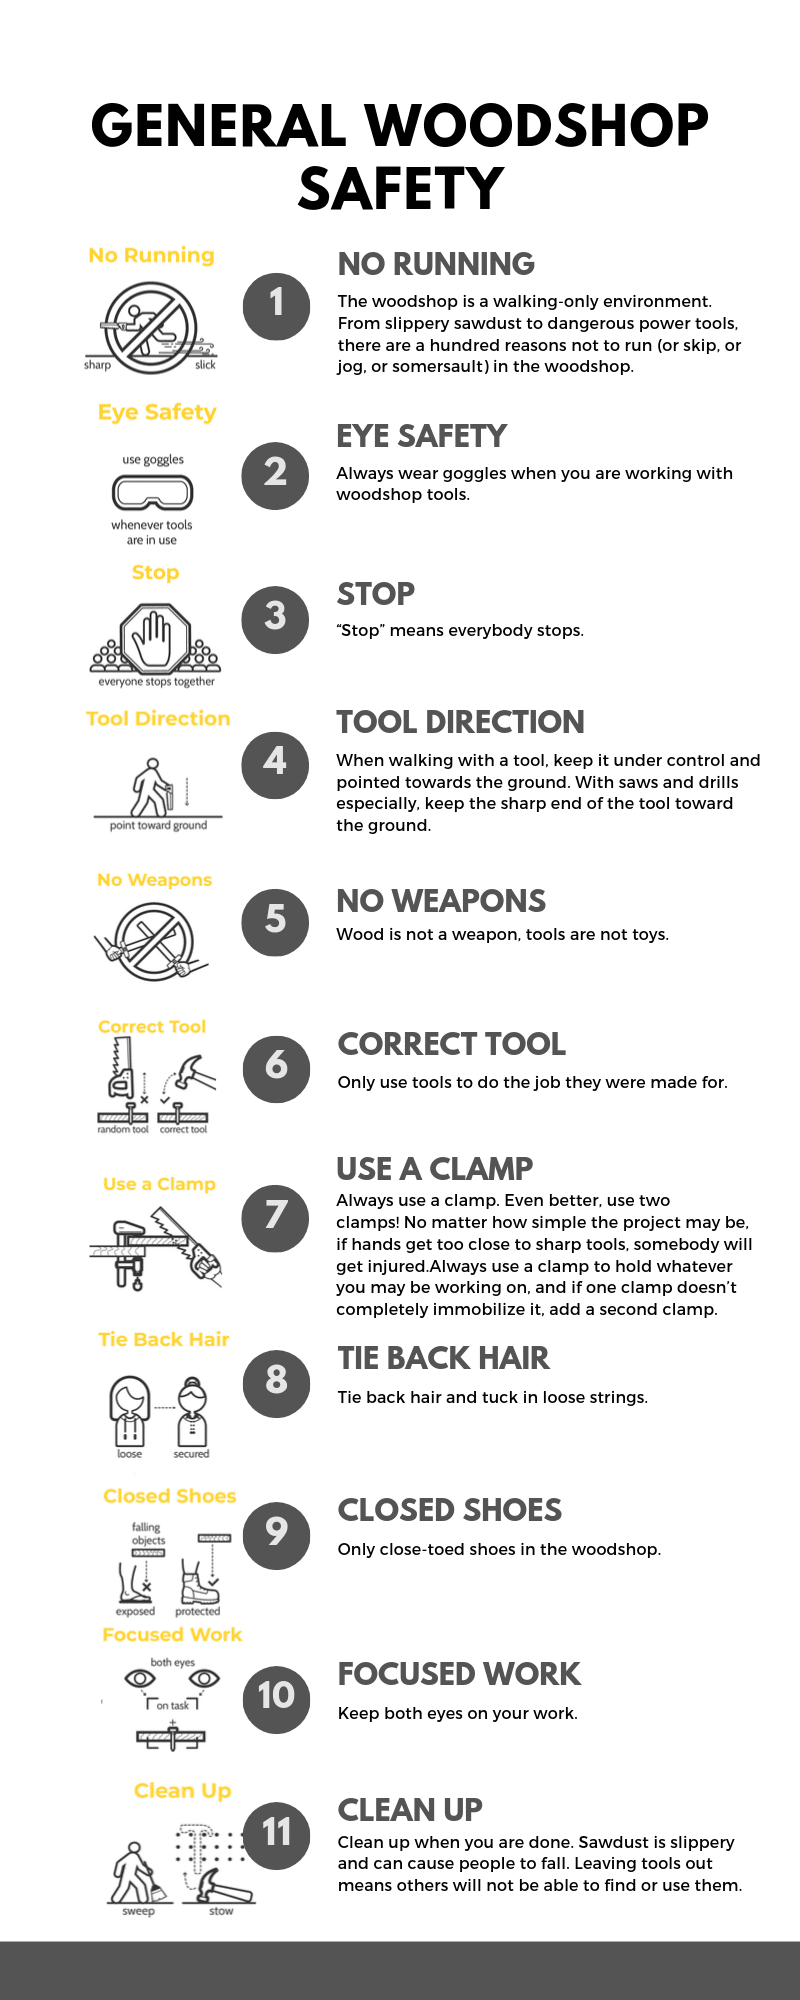
It is essential that teachers and students have clear safety rules when working in a space with tools. In addition to General Woodshop Safety (see the infographic and printable version here), making in an elective or after-school setting has additional safety concerns and challenges. While your school administration may have additional rules to follow in your particular space, the following is a list of guidelines to support your class. For more information on woodshop safety, visit our curriculum site.
You will also need to establish a signal that lets students know it’s time to stop, look, and listen. This is essential as making isn’t silent and there will be times when you need to get everyone’s attention quickly. And, students will need to understand that if you yell “STOP,” the expectation is that everyone stops what they are doing and becomes silent. It is imperative that in the event of a potentially hazardous situation such as a student using a tool inappropriately or not wearing goggles near someone with a tool, etc., students STOP for their safety and the safety of others.
THE POWER OF OBSERVATION
Teachers know how valuable observation is as a tool for formative assessment (in-process evaluation of student skills). It is also foundational to creating a space that remains safe while also fostering student agency and collaboration. Mastering observation takes a lot of effort, but as you run the course, use observation to assess students comfort with tools in order to help create a safe workshop space.
RESPECT STUDENT CAPABILITY
Observation also allows the teacher to take note of student capabilities. While we want students to work through challenges, and we refrain from doing for children what they can do for themselves, noticing when small hands are tired is an important safety issue. Pay attention to opportunities when you can give student work a quick “turbo boost” without taking away their confidence. Maybe it’s help guiding a cut that they are making or having them do the main sawing session while you finish up a couple of their other cuts. Just as doing the work for students doesn’t help them to gain confidence and a feeling of agency, neither does feeling frustrated by a lack of progress.
RESPECT THE SPACE
- You will need to bring your materials in and out of the space each week.
- Don’t use the teacher’s materials, even pencils and papers, without his or her explicit consent.
- Make sure you give adequate time and attention to clean up. If you will be working in a classroom with a carpet, we highly recommend using a tarp as it will aid in the clean up immensely.
- Use a spoil board or drilling table when working with tools. This will ensure that the tables aren’t damaged from sawing or drilling.
TIPS AND TRICKS
Making is messy. These tips and tricks will help.
- Whenever you can, set up stations! (Designating certain areas for specific work simplifies clean up. For example, rather than saw all over the room–pick one spot! Do the same for other types of work, even the non-messy jobs.)
- Make it clear to students where they can find materials, especially the broom, dustbin, and paper towels.
- If you can’t avoid sawing and drilling near a rug, use a tarp!
- To make clean up even faster, assign students specific jobs. Feel free to use this clean up chart (assigning as many students to each job as needed) or create your own.
SPOILER BOARDS AND DRILL TABLES
Not sure what a spoil board is? No idea how to create a small drill table? No problem. Your bin includes spoiler boards to use in the classroom to protect surfaces. Make sure to place these pieces of MDF over the edge of your table so that you don’t accidentally cut your table.
These videos will guide you through creating your drill table (parts included in your starter kit) for use in this program. For step-by-step instructions, click here or download the attached resources.